When setting up this site, one of the key considerations was site speed and how we could use a CMS that was familiar, well supported and above all fast. So how come this site uses WordPress, a CMS not renowned for its speed?
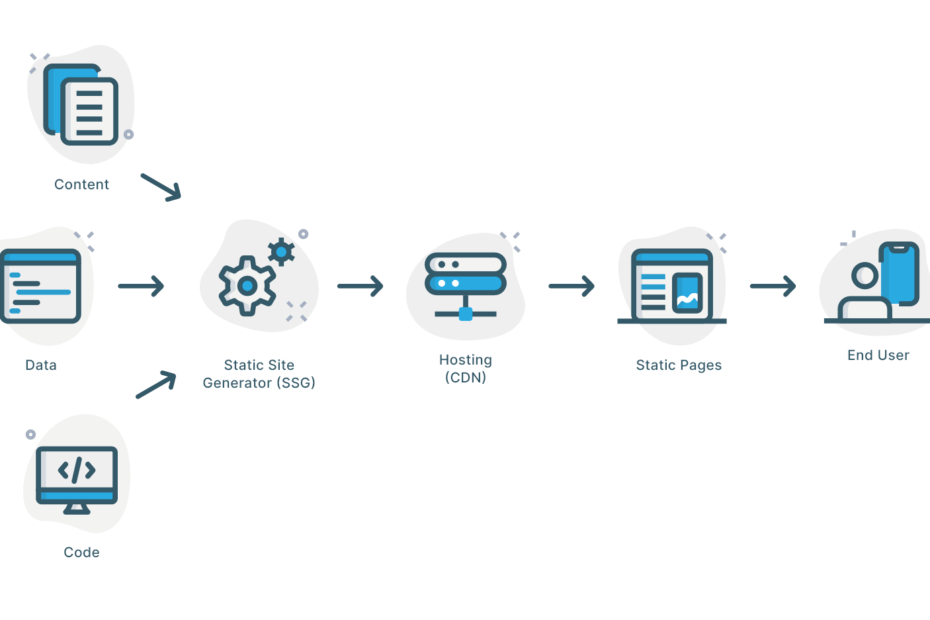
In reality the site uses WordPress only as a CMS, but is rendered out as a static site that’s hosted on Netlify. To get there took a while, and we went through using Gatsby sitting on top of WordPress and using WPGraphQL thanks in no small part to this tutorial, but the front end was a huge pain to work with and quickly realised that it was going to be a time sink.
However here’s how we did it in the end so you can too – there will be a LOT of links to tutorials which we hope help
Setting up WordPress on Amazon Lightsail
Follow the handy instructions here to get started with Lightsail and AWS, but don’t manage your DNS through AWS – we’ll use Netlify for this later on.
Once you’ve created your instance and got WordPress running, you’re going to want to do things like change the default user account name, email address and setup a secure certificate. There is, once again, a helpful guide here for beginners, and a slightly more advanced guide here – which in honesty is a bit more useful, but in essence, choose a subdomain to run WordPress on as you’re going to want to be running your static site on www.
If you get into any trouble with the Bitnami version of WordPress, this guide on troubleshooting is useful.
Themes and plugins
The majority of plugins default added to WordPress with Bitnami can be deleted – if you particularly like them then do keep them, but there’s not a lot that’s needed. We installed Yoast SEO for SEO purposes, but the main plugin you’ll need is Simply Static and for automated deployments via Github which can then be pushed to Netlify (or Cloudflare) Simply Static Pro.
For the theme for this site we chose the free version of Neve. It’s lightweight, works with Gutenberg and easy to use.
Github
Once your site is setup and looking somewhat presentable then it’s time to setup Git and link it to Netlify so you can automatically deploy your static site. You could probably deploy to Github pages for free too if your site repo was public, we didn’t want a public repo for this site so we’re using Netlify’s free tier which allows a number of minutes of build time per month.
You’ll need to decide on the URL you’re using for your static site – and add that in to the Simply Static Pro config – then we’ll come back to that when we look at Netlify
Create an account on Github if you don’t already have one, and go through the steps outlined on the Simply Static site here to link the static version of your WordPress site to your Github account, however you don’t need to follow the section on Github actions, instead head over to Netlify to set up that side of things.
We have found that creating a branch for deploys to go on to from Simply Static helps in not having a whole heap of commits happening – we can create a pull request from one branch to the main and then squash and merge to make a single commit on main – this would help with Cloudlfare pages where you’re limited by a number of commits per month rather than commit minutes per month
Netlify
Sign up to Netlify by signing in with Github and add the Netlify app to your Github account, then choose the repository and branch you’ll be deploying from. We’d suggest deploying from your main branch for the reasons above, and it also means you can preview when you create a pull request.
You don’t need to add a base directory, build directory or any build commands, but you’ll need to add your main static site URL as a custom domain. The easiest way of doing this is to have Netlify manage your DNS so you point your domain’s nameservers to Netlify – naturally you’ll need to copy over any existing record details to Netlify – particularly the subdomain and IP address of the subdomain on Lightsail where your WordPress installation lives.
Netlify has a ton of helpful guides, and this one is a great starting point
Deploying and getting your site live
Now you should have a WordPress site with a plugin that will generate static content, a process to deliver that to a branch on Github and automatic deploys from your main branch to build your static site.
All you need do now is hit ‘generate’ on Simply Static Pro, head over to Github and create a pull request to merge your branches and your site should appear on your chosen domain!
Gotchas and issues
There seem to still be some issues with Simply Static Pro – forms, comments, search and auth all cause problems, and while this is frustrating, but it’s a relatively new release and we know the developer is working on these issues.
It’s possible to do the same thing with Cloudflare, but you’re limited on the number of deploys per month. If you’re wanting to use Cloudflare then don’t push straight to your main branch, as Simply Static Pro creates a LOT of commits, and each commit is a deploy in Cloudflare world. Instead push from Simply Static to a branch, pull request, squash and merge.
Other useful resources
https://www.brianshim.com/webtricks/wordpress-static-site-generator/
https://sabrinazeidan.com/serve-scaled-images-wordpress/
https://blog.futtta.be/2021/02/25/contact-form-7-update-breaks-autoptimize-js-optimization-workaround/
